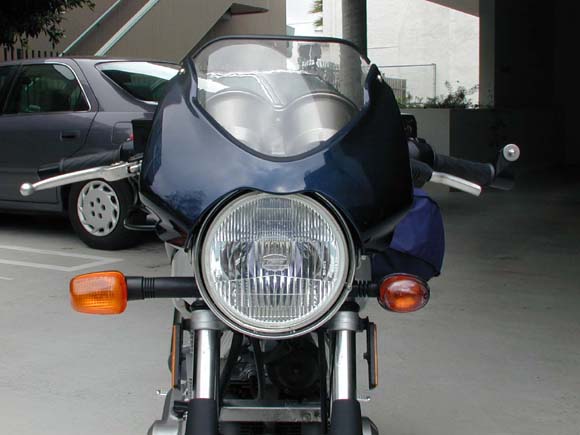
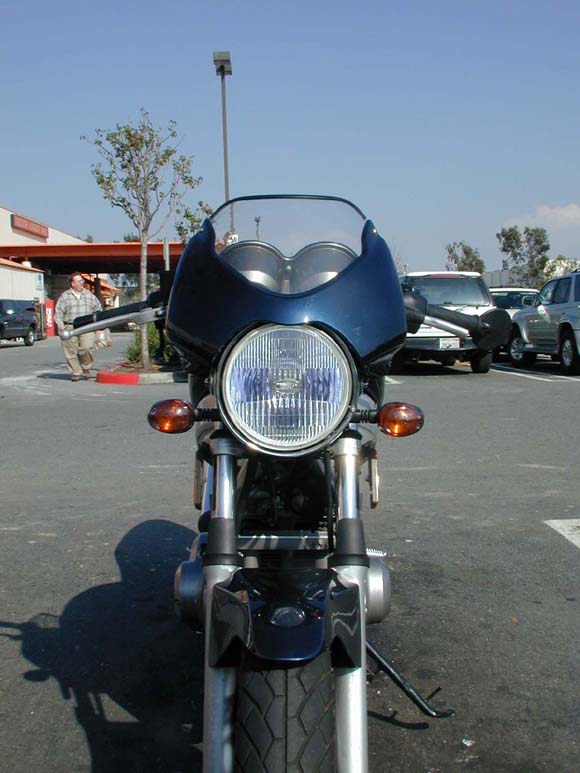
Why do this? Many people, including me, complain about the size of the stock turn
signals, from how far they stick out to how big and bulky they are, both front and back. Most go the aftermarket route but
these are usually much less bright than any stock turn signal. I opted to go to Buells because they have shorter stalk, are
slightly less tall, and much less bulky than originals and are pretty cool looking with their smoke clear outer lens and amber
inner lens. It's been noted that these are actually brighter than the stock GS turn signals by other GS riders. They are also
very cheap-$7/each new at Harley-Davidson/Buell dealer and are usually in stock. All Buells use the same turn signals;
the part numbers are not model dependent. You could adapt these instructions (making necessary adjustments) to any stock
turn signal. You could alternatively use the stock GS rear turn signals
(you have ditched them already haven't you?). Also, you may want to disconnect battery to do this work, I chose not
to.
I use the Buell rear signals for the front also because the front Buell's have a 1" longer stalk than the rears.
1. Start with bike on centerstand or sidestand, not important which as you won't be drilling for front
signal mounting. In order to make install as easy as possible I re-use the stock mounting location which simplified
installation considerably.
2. Remove headlight assembly by removing two phillips head screws located on lower part of headlight,
at about 5 and 7 o'clock. Unplug the headlight socket and set aside headlight remembering which side is up. You need
to do this to access the wires.
3. Remove nut from back of existing turn signal. This is easier said than done. There isn't much
room between the signal bracket and the headlight bucket. I had to find a very think open end wrench but managed to get it
off quickly once I had. Cut turn signal wires inside headlight bucket leaving about a 6" pigtail and pull
signal out. You have to splice the new signals into the existing wires since the new signals only have ~6" pigtail on
them. They come with male bullet conectors so you'll have to buy some 16-14 size female bullet connectors and crimp to existing wires.
4. Slide new signal into existing mounting hole. Slide serrated washer and nut over wires, onto shaft
and tighten everything down, making sure the signal is horizontal. Again, you need to find a very narrow wrench to tighten
the nut. I took an old wrench and used a grinder to take material off in order to make it work.
5. Connect the Buell Black wire to the GS black/white wire (ground) and the Buell blue wire to the GS
black wire.
6. Check signal operation.
Note: The bulbs that come with the Buell turn signals are different wattage (and smaller physically)
than stock GS and will make the signal blink faster than before. I've been told this will not harm anything-leave them as
is at your own risk. All it takes is a Tridon 552 lfasher relay, I believe. Available at any auto parts
store. About $2-$3.
Another alternative is to replace bulb with one that matches the GS stock bulb but in amber.
This will require you to remove the inner amber lens of Buell signal in order to fit the physically larger GS bulb.
7. Repeat other side.
8. Replace headlight.
The left and right part numbers for the rear Buell signals are different but the
actual units are the same.
Left Rear Turn Signal-p/n Y0526.K ($6.95)
Right Rear Turn Signal-p/n Y0527.K ($6.95)
You'll also need the serrated washer, p/n B1000.4z and the thin nut, p/n d1000.4fz (you'll need
one each per signal).
Some that have done the Buell turn signal swap have had
a problem where the blinker turns on steady without blinking. It was discovered that it had to do with not having
enough draw across the flasher unit. By installing a new generic flasher, available from Wal-Mart for about $2, (It's
just a round cylinder with two connectors, it's hidden behind the plastic anyway) solved the problem, or use the relay mentioned
above.