|
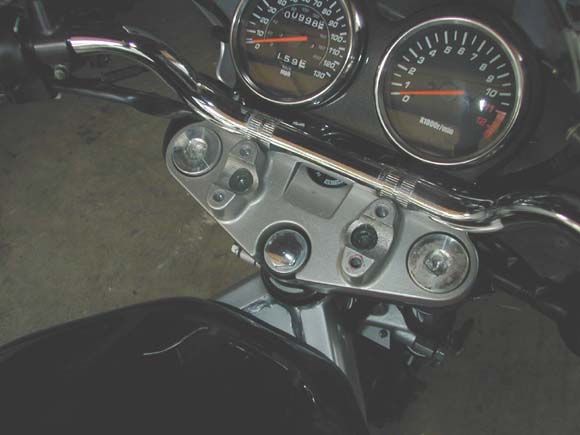
Work one fork leg at a
time. If you remove both springs at same time the front will collapse and the bike will roll off the centerstand. With the bike on its centerstand remove the 4 allen head bolts holding the handlebars and remove
handlebars. No need to remove any switchgear, all youre doing is moving bars just far enough to clear the fork caps.
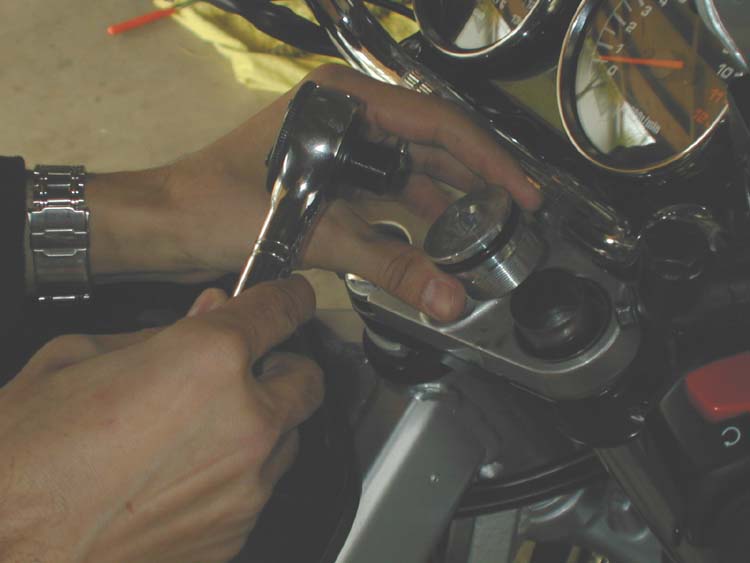
Using a 1/2" drive socket
wrench without a socket, remove the fork cap bolt and attached o-ring (see photo). There
is usually a little spring tension so be careful. The cap usually requires a special tool for removal but the 1/2" socket
conveniently fits perfect. At this point you can see the top of the stock spacer. Remove it.
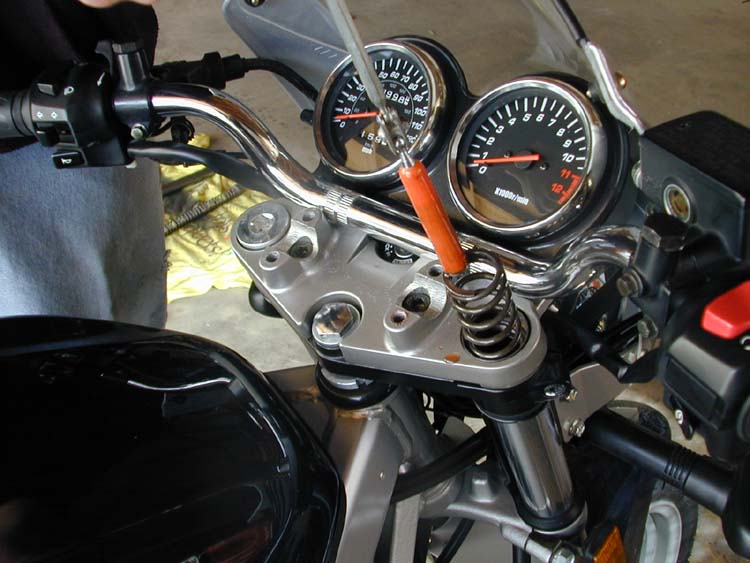
The stock fork spring is very short compared
to the Progressive-Suspension springs. Youll need to fish the spring and the spring seat out with either a bent wire (like
a clothes hanger-just be careful not to scratch the inside surface of the fork) or you can use an extended magnet, like shown
in picture-much easier. The spring seat will be sitting on top of spring and is a seat for the spacer. This comes out too.
Installation is the reverse of these steps.
Insert the Progressive-Suspension spring, spring seat and new spacer-cut to size (3/4"-1", per Progressive-Suspension). Progressive springs do not come with their own spacer material. You can use a PVC
pipe to cut a spacer from or you can also cut the stock spacer if you choose. Make sure you lightly sand the cut end of the
spacer to avoid getting metal shavings in the fork leg. Here's a tip for using PVC for spacers instead
of cutting thin metal spacer material that comes as stock spacers: just go to hardware store and buy a PVC fitting in the
size you want; try a Schedule 40 end cap made for 1/2" pipe; that works perfectly. The end cap is just about one inch long,
which fits the recommendation of 3/4" to 1". With the 1" spacer the spring was not especially difficult to depress when installing
the end cap, but the threads are fine, so use caution.
The
new spacer will stick out above the top of the triple clamp. To replace the fork cap bolt its easiest to place it on spacer,
place 3/8 drive socket wrench on it (without a socket) and turn it slowly while applying pressure with your palm, feeling
for the threads to catch. Be very careful not to cross-thread the cap. Once you
are done with one side continue to the other side using same steps.
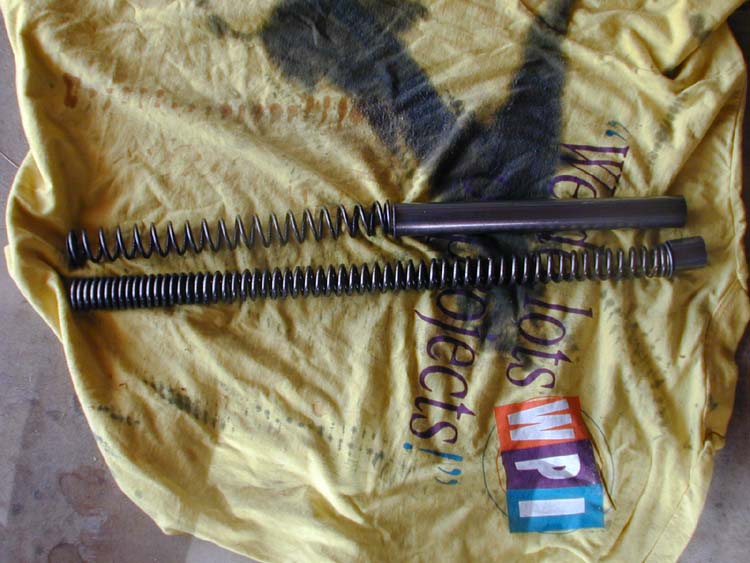
Picture shows the stock
spring, spring seat and spacer on top and the Progressive-Suspension spring and stock spacer cut down on bottom. You re-use
your stock spring seat. Notice how much longer and thicker the Progressives are compared to stock. I did this install without changing the fork oil to heavier, 15W oil; stock oil is 10W. The ride is greatly improved without fork oil replacement but will be even better with thicker oil. You
might consider the following lazy way directions for switching fork oil.
Here's a tip for using pvc for spacers instead of cutting thin metal spacer material that comes
with springs (or stock spacers): just go to hardware store and buy a pvc fitting in the size you want. Try a Schedule 40 end
cap (made for 1/2 inch pipe); that worked perfectly. The end cap is just about one inch long, which fits the recommendation
of 3/4 to 1 inch. With the 1-inch spacer the spring was not especially difficult to depress when installing the end cap, but
the threads are fine, so use caution.
Replacing 10W fork oil with 15W fork oil-The Lazy way
Go to a veterinary
supply (or a vet) and purchase a large syringe with a catheter hose end on it and add some stiff plastic tubing. Make sure the tubing is long enough to reach the entire length of the fork. The syringe needs to hold about
a pint when full so the job wont take too long.
Check
the fork oil level with a straight wire, rod or straightened coat hanger that reaches all the way to the bottom-use as a dipstick. Fill one leg at a time until you have the correct amount of oil; verify this with
the dipstick often. Make sure not to use a wire too short and drop it. Use the dipstick to match the other fork leg oil level.
There is always some oil left in the tube after draining so this keeps them equal.
WARNING ABOUT THIS METHOD OF FORK OIL REPLACEMENT: This will not completely drain the old oil out of a fork. For one,
there is valving in the bottom end that the suction tube will not penetrate. And it takes a while for all the oil to drain
off the walls and out of the tubes even when they are properly taken out of the bike and turned upside down. Additionally,
if there is any crud such as the minute bits of filings that accumulate at the bottom of the tubes, this will not be removed
either.
|